
How To: Create a test Linux Service
Scenario
This how-to applies to creating a test service on customer’s Linux machine. This may help identify issues of CT&I Agent detecting Linux Services.
Create a test service
Create a script named
create_test_service.shto create and set up the service, with below content. The service namedtest.service, and will keep writing a log to/tmp/test_service.logevery 30s.1 2 3 4 5 6 7 8 9 10 11 12 13 14 15 16 17 18 19 20 21 22 23 24 25 26 27 28 29 30 31 32 33 34 35 36 37 38 39#!/bin/bash # Create the script that the service will execute cat <<EOF > /usr/local/bin/test_service.sh #!/bin/bash touch /tmp/test_service.log while true; do echo "Test Service: \$(date)" >> /tmp/test_service.log sleep 30 done EOF # Give the script execution permissions chmod +x /usr/local/bin/test_service.sh # Create the systemd service file cat <<EOF > /etc/systemd/system/test.service [Unit] Description=Test Service [Service] Type=simple ExecStart=/usr/local/bin/test_service.sh Restart=always [Install] WantedBy=multi-user.target EOF # Reload systemd to make the new service take effect systemctl daemon-reload # Start the service systemctl start test.service # Enable the service to start on boot systemctl enable test.service echo "Test service created and started."Use following commands to run the script
1
2
chmod +x create_test_service.sh sudo ./create_test_service.shUse
systemctl status test.serviceto check the service status. The output would look similar to below.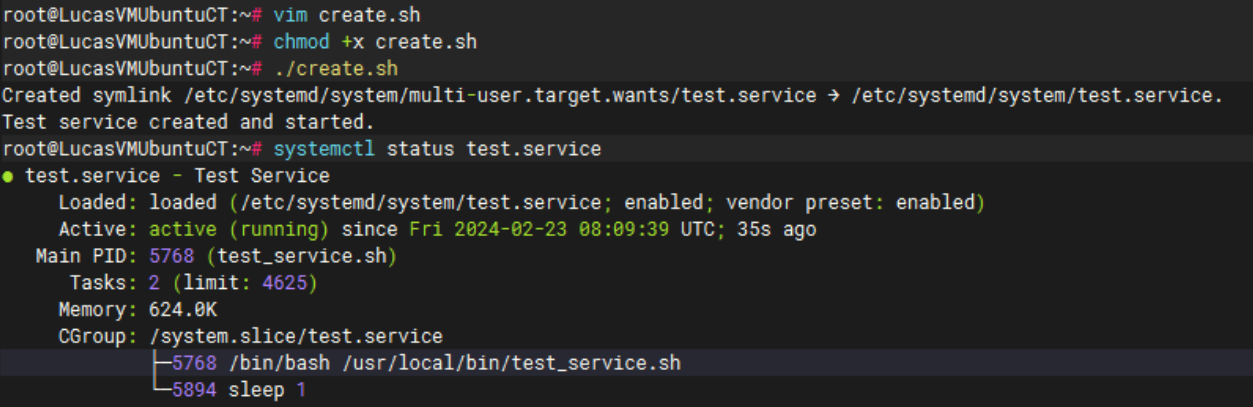
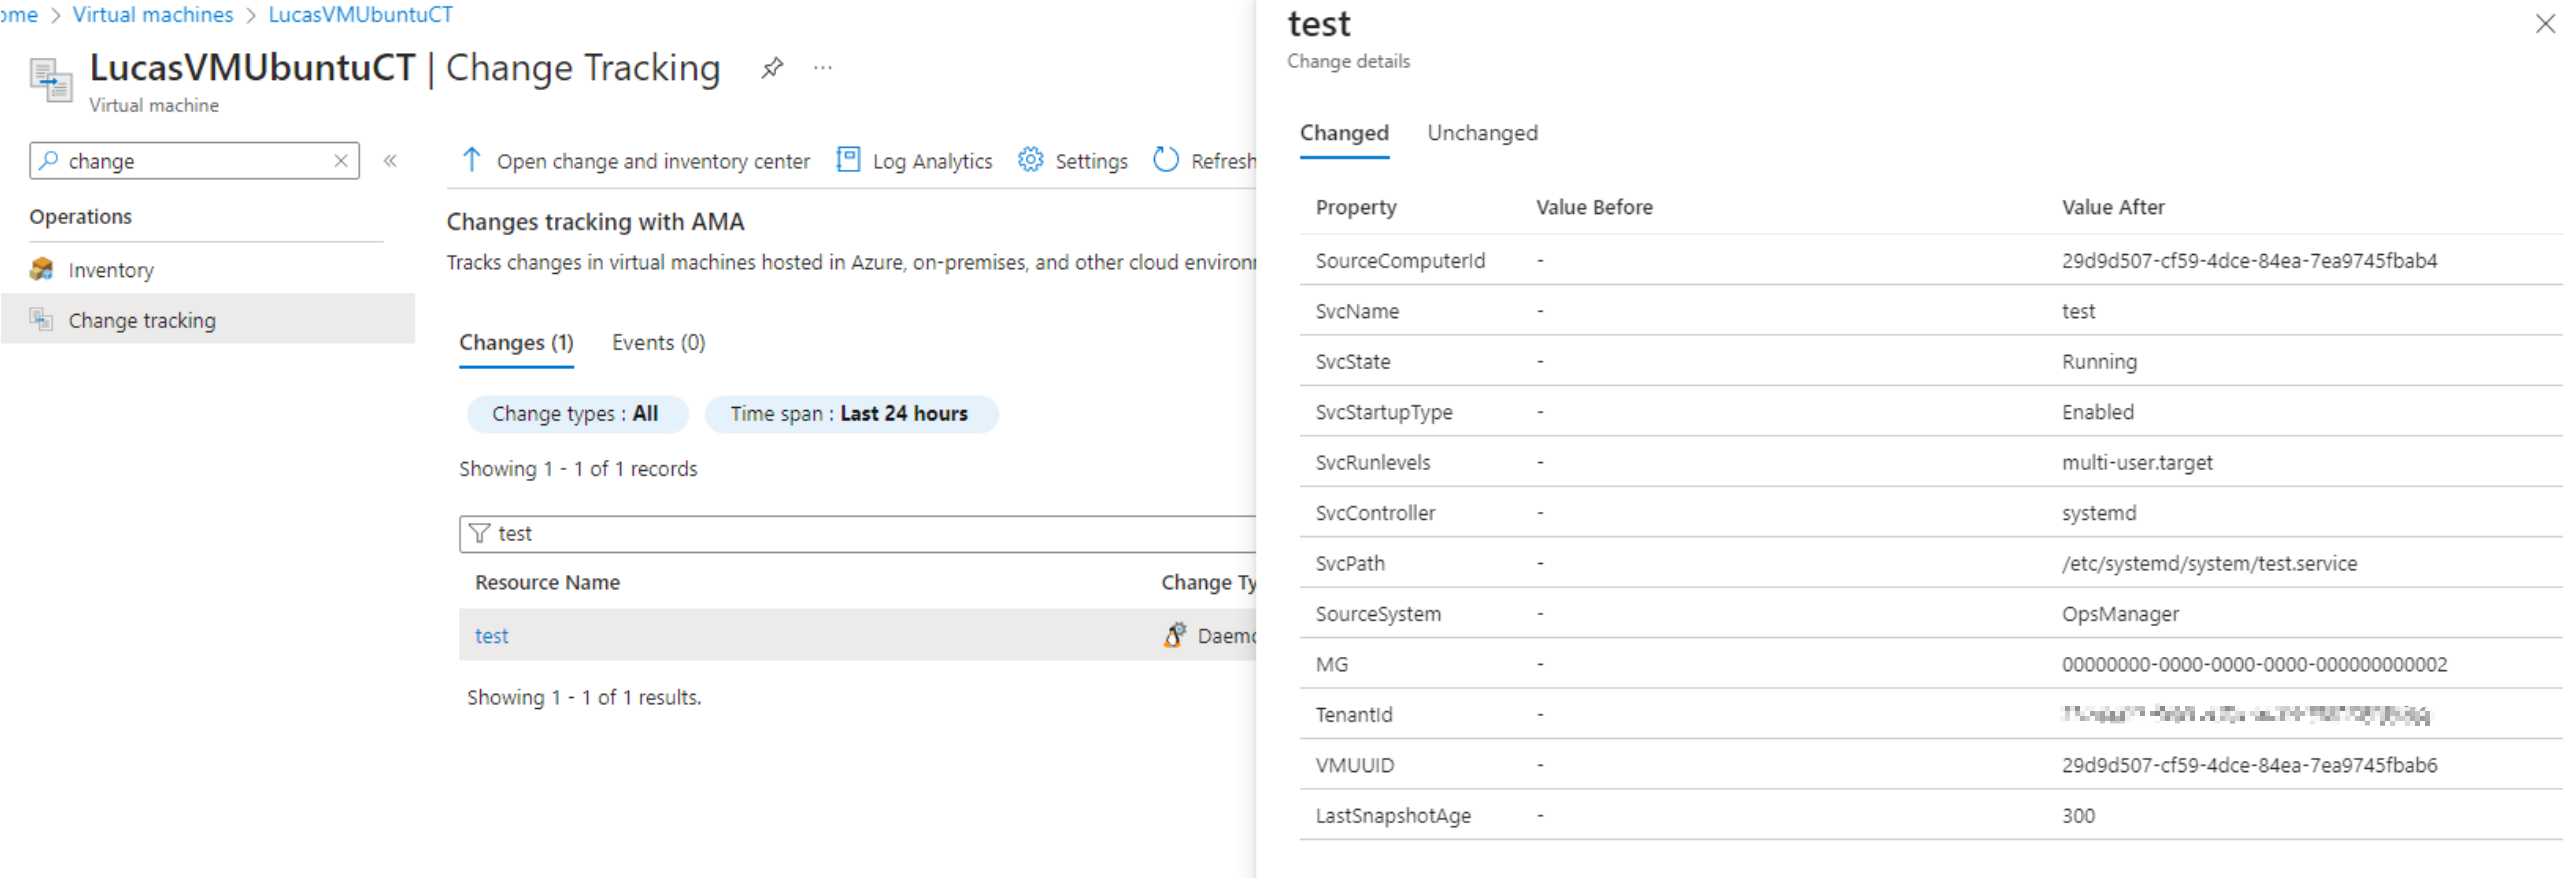
Let the service run for more than 5 mins so that CT&I Agent should be able to detect it. The result will look similar to below on Azure Portal
Clean up environment
Once test is done, create a script named
cleanup_test_service.shto clean up the test service, with below content.1 2 3 4 5 6 7 8 9 10 11 12 13 14 15 16 17 18 19 20 21 22#!/bin/bash # Stop the service systemctl stop test.service # Disable the service to prevent it from starting on boot systemctl disable test.service # Remove the service file rm /etc/systemd/system/test.service # Remove the script that the service was executing rm /usr/local/bin/test_service.sh # Remove tmp logging rm /tmp/test_service.log # Reload systemd to apply changes systemctl daemon-reload systemctl reset-failed echo "Test service has been removed."Use following commands to run the script
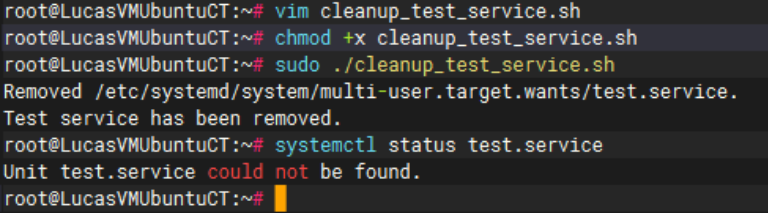
1
2
chmod +x cleanup_test_service.sh sudo ./cleanup_test_service.shDouble check the service removal by
systemctl status test.service. The result will look similar to below
How To: Manually Restart CT&I Linux Agent
Scenario
If you are ever in the position where you need to restart the CT&I Agent for Linux, the following process will give you some guidance.
Method 1 (Recommended)
This is using the same commands the Azure VM Guest Agent uses to maintain the agent. You will need to browse the installation directory from a shell and execute the script using either the -disable parameter or the -enable parameter. This will need to be done as the root user.
Go to /var/lib/waagent/Microsoft.Azure.ChangeTrackingAndInventory.ChangeTracking-Linux-{extension-version}
As high privilege user run
./cta_linux_handler disableWait for few minutes until following processes are finished /usr/sbin/changetracking/changetracking /opt/microsoft/changetracking/change_tracking_agent_linux_amd64
To enable the agent back
./cta_linux_handler enable
Method 2 (If method 1 does not work)
systemctl restart cxp.service
How To: Manually Purge CT&I Linux Agent
Scenario
If you are ever in the position where you need to manually purge the CT&I Agent for Linux, the following process will give you some guidance.
Make sure to uninstall the CT&I extension from Azure Portal first, regardless of a failed uninstallation, as below process is only for the agent on OS, not for extension itself.
Method 1 (Recommended)
This is using the same commands the Azure VM Guest Agent uses to maintain the agent.
| |
Method 2 (If method 1 does not work)
- Remove cxp service
| |
- At this stage, cxp.service is still available via
systemctl status cxp, though in failed state.. Optionally runsystemctl reset-failedto remove cxp.service from systemd. - Remove change-tracking-retail package
- Redhat series :
yum remove -y change_tracking_retail - Debian series :
apt remove -y change-tracking-retail
- Redhat series :
- Remove local files
- /opt/microsoft/changetracking/*
- /usr/sbin/changetracking/*
- Optional: /var/lib/waagent/Microsoft.Azure.ChangeTrackingAndInventory.ChangeTracking-Linux-/
- Optional: /var/log/azure/Microsoft.Azure.ChangeTrackingAndInventory.ChangeTracking-Linux/*
How To: Manually Onboard CT&I Linux Agent
Scenario
If you are ever in the position where you need to manually onboard the CT&I Agent for Linux, the following process will give you some guidance.
Method 1 (Recommended)
This is using the same commands the Azure VM Guest Agent uses to maintain the agent.
| |
Method 2 (If method 1 does not work)
- Manually install “change-tracking-retail” package
- rpm series (Redhat, CentOS, SUSE, etc.)
1
2
cd /var/lib/waagent/Microsoft.Azure.ChangeTrackingAndInventory.ChangeTracking-Linux-* rpm --force -i change-tracking-retail_<version>.rpm - dpkg series (Ubuntu, Debian, etc.)
1
2
cd /var/lib/waagent/Microsoft.Azure.ChangeTrackingAndInventory.ChangeTracking-Linux-* dpkg -i change-tracking-retail_<version>.deb
- Manually setup cxp.service
create and add below content to
/lib/systemd/system/cxp.service.Note: Below content has one place that needs to be modified to the correct extension version. For checking the current extension version, please use command
ls /var/lib/waagent/ | grep ChangeTracking1 2 3 4 5 6 7 8 9 10 11[Unit] Description=Azure change tracking Parent Daemon Wants=network-online.target After=network-online.target [Service] ExecStart=/usr/sbin/changetracking/changetracking /opt/microsoft/changetracking/change_tracking_agent_linux_amd64 /var/lib/waagent/Microsoft.Azure.ChangeTrackingAndInventory.ChangeTracking-Linux-<**replace-correct-version**> Restart=on-failure [Install] WantedBy=multi-user.targetchmod 0644 /lib/systemd/system/cxp.servicecp /opt/microsoft/changetracking/svc/changetracking /usr/sbin/changetracking/chmod 0755 /usr/sbin/changetracking/changetrackingsystemctl enable cxpsystemctl start cxpNote: You may backup any files in
/usr/sbin/changetracking/if exists prior to these scripts.
How To: Enable Trace Logging of CT&I Linux Agent
Scenario
If you are ever in the position where you need to trace down details on how CT&I Agent Linux works, the following process will give you some guidance.
Step 1: Change Log Level in Configuration File
In order to enable debug logging of CT&I Agent, we need to edit the configuration file /var/lib/waagent/Microsoft.Azure.ChangeTrackingAndInventory.ChangeTracking-Linux-*/application.yml. There is three parts we need to take care of:
Enable trace logging for
/var/log/azure/Microsoft.Azure.ChangeTrackingAndInventory.ChangeTracking-Linux/cta_linux_agent.log. The is the main agent log, which contains communication with AMA and details of Files/Services/Software inventory and changes. Edit the level toTRACE.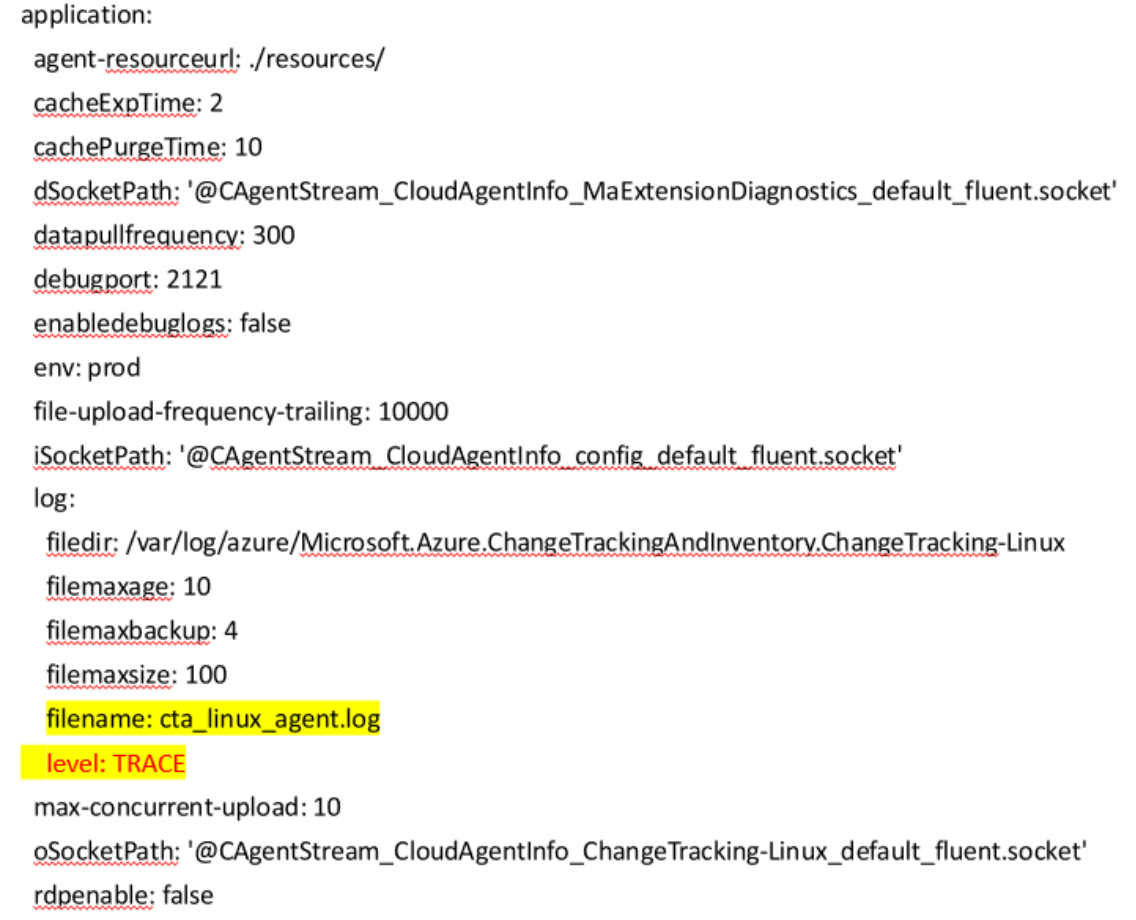
Enable trace logging for
/var/log/azure/Microsoft.Azure.ChangeTrackingAndInventory.ChangeTracking-Linux/cta_linux_handler.log. The is the log of handler services, brings up agent main process, provides basic environment parameters to the agent. Edit the level toTRACE.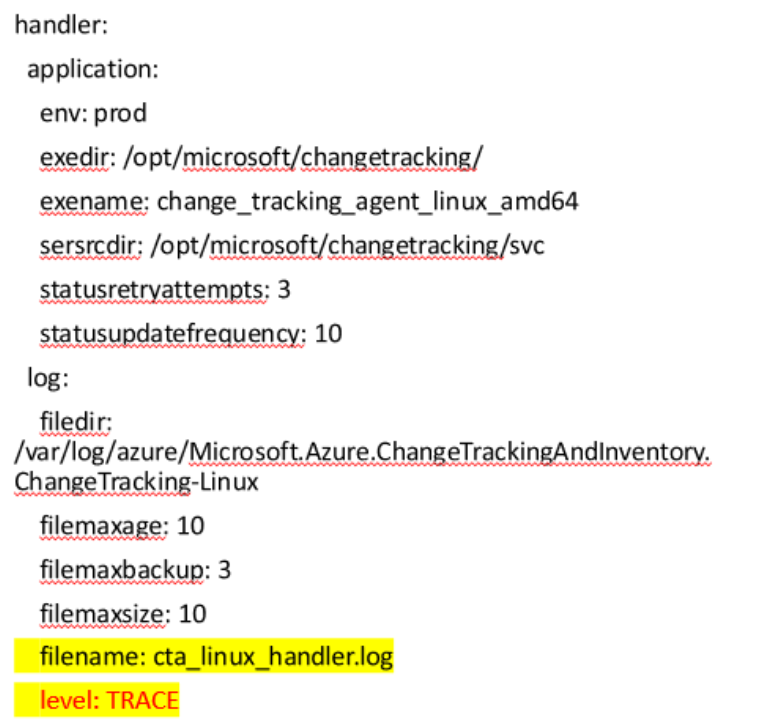
Enable trace logging for
/var/log/azure/Microsoft.Azure.ChangeTrackingAndInventory.ChangeTracking-Linux/cta_linux_watcher.log. The is the log of checking whether agent main process/service are running. Edit the level toTRACE.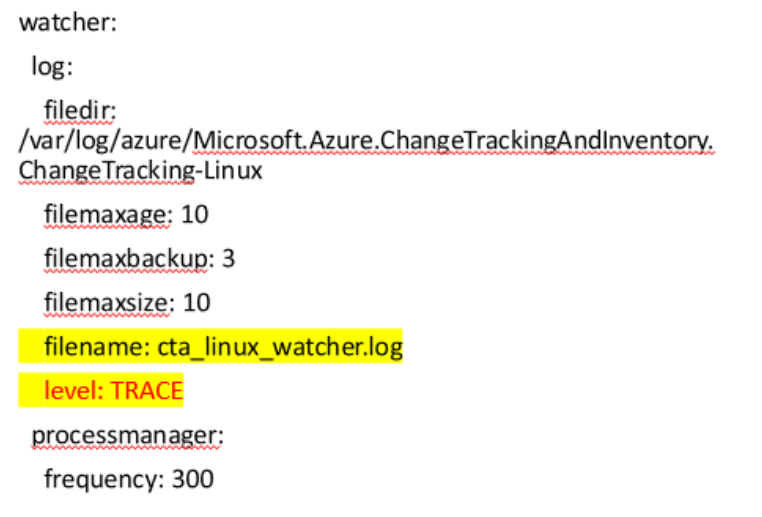
Step 2: Restart CT&I Linux Agent
- For how to restart CT&I Agent, Please refer to How To: Manually Restart CT&I Linux Agent .
Note:
- After restarted the CT&I Agent, we need to wait for some time for debug logs being populated. Typically 1 hour would be good to collect a cycle run of Services, Software and Files.
- Please change the collection level back to avoid filling up disk space after debug logs are collected.